Looking for info on How to Build a Deck Step by Step with pictures?
I’ve wondered how to build a deck step by step for years! I had a deck built for a house once. It looked great but it cost a lot of money! The kind of money I don’t have now.
Last spring, I decided it was time to figure it out.
So I set about learning how to build a deck step by step with my friend Dave.
To build a deck, start by:
1. Placing concrete deck blocks about every 3-5′. They don’t need to be level with each other but should be level with the ground, so shovel the ground as needed.
2. Place 4×4 posts in each concrete block going up
3. Run 2″x6″ between the 4×4 posts & cut off any excess post above the level board
4. Run wood braces between the 2×6 boards
5. Attach deck boards running opposite the 2×6 boards
6. Stain
Make no mistake, Dave was the brains of the operation. But in helping him, while he is certainly VERY skilled, I came away realizing just how easy it would be for most folks to build a deck too.
So in this post, I’m going to detail everything involved in how to build a deck step by step with pictures.
(Best Diy Crafts Ideas For Your Home : Tips on wooden deck materials and finishing (and refinishing!)) https://t.co/I6ljjE74Zc | Your daily source of DIY ideas, Craft projects and Life hacks – https://t.co/FNeMro7bus pic.twitter.com/X7DaYXfCBC
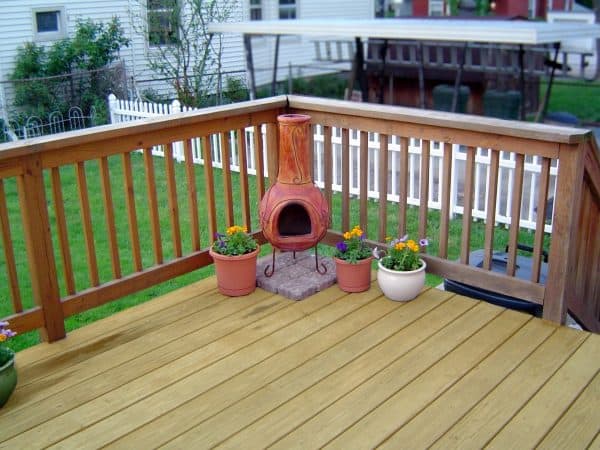
Yes, you can get fancier.
You could add fancy railings. And you could have multiple levels, etc. I’m not a master carpenter. But I can tell you that a somewhat basic deck has transformed our backyard into someplace we love to hang out now.
That was not the case before I decided to build a deck.
Ready to build your deck? Jump right to my recommended tools and supplies page! I only recommend the very top-rated tools and items, taking the worry and hassle out of figuring out what to buy.
You can get everything you need quickly and easily by ordering on Amazon or pre-ordering with Lowes or Home Depot and having it ready for pickup.
How much does it cost to build a deck DIY?
The key to making this less costly was to not pour concrete. You could trench holes, buy, mix, and pour concrete, but in my experience, these inexpensive concrete blocks work great and they have held up well.
No, we used these simple concrete deck blocks from Lowes. They call that a “12 in. x 8 in. x 12 in. Concrete Patio Pier Block” and the company who makes them is called Headwaters.
They are $6.52 each (as of this writing).
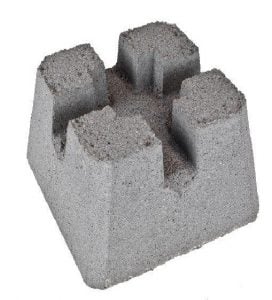
Full disclosure, we did have a few of these where one of the 4 corners broke off as we put the 4×4 posts in the center.
We just got some concrete adhesive (comes in a tube like silicone) and we just put a little on there and stuck the corners back on and they worked just fine.
Annoying for sure, but still a whole lot easier than digging post holes and pouring concrete!
All told, we spent about $1,600 to build our deck. That included money I paid Dave for his assistance. So if you are truly doing this on your own, depending on size, you could come in under $1,000!
Thus, building your own deck doesn’t have to break the bank!
But let’s get into how to build a deck step by step with pictures!
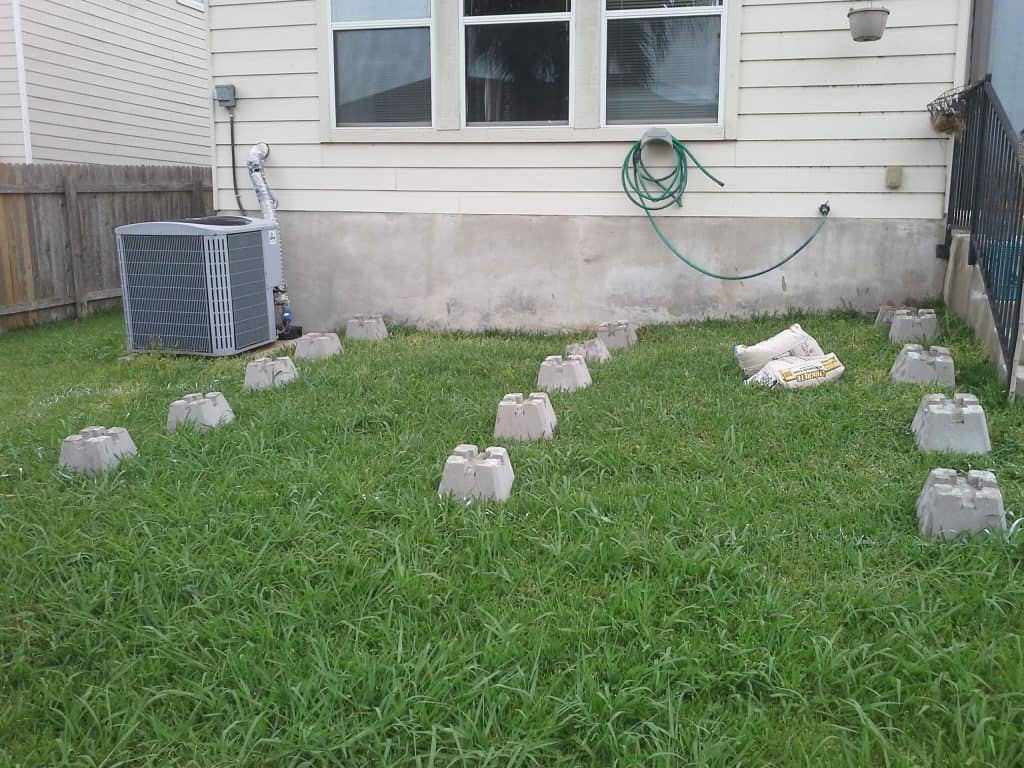
STEP 1 -Placing the concrete blocks
This is the first step in how to build a deck step by step with pictures.
These blocks provide the main support for your deck, so it is crucial that you use enough of them and spread them out evenly to distribute the weight properly.
For the blocks, while they don’t have to be level with each other, you do want them level in general. So if your yard is uneven, be prepared to use a shovel to dig to make the ground flat where you plan to put them.
Again, don’t worry if one is a few inches higher than the other (we’ll get to why in a minute), just make sure they sit level.
At most you want one of these blocks every 5 feet, so we went with 5 feet across but every 3 feet deep from front to back. Here’s what it looked like when we just put the blocks down (we have not yet leveled them).
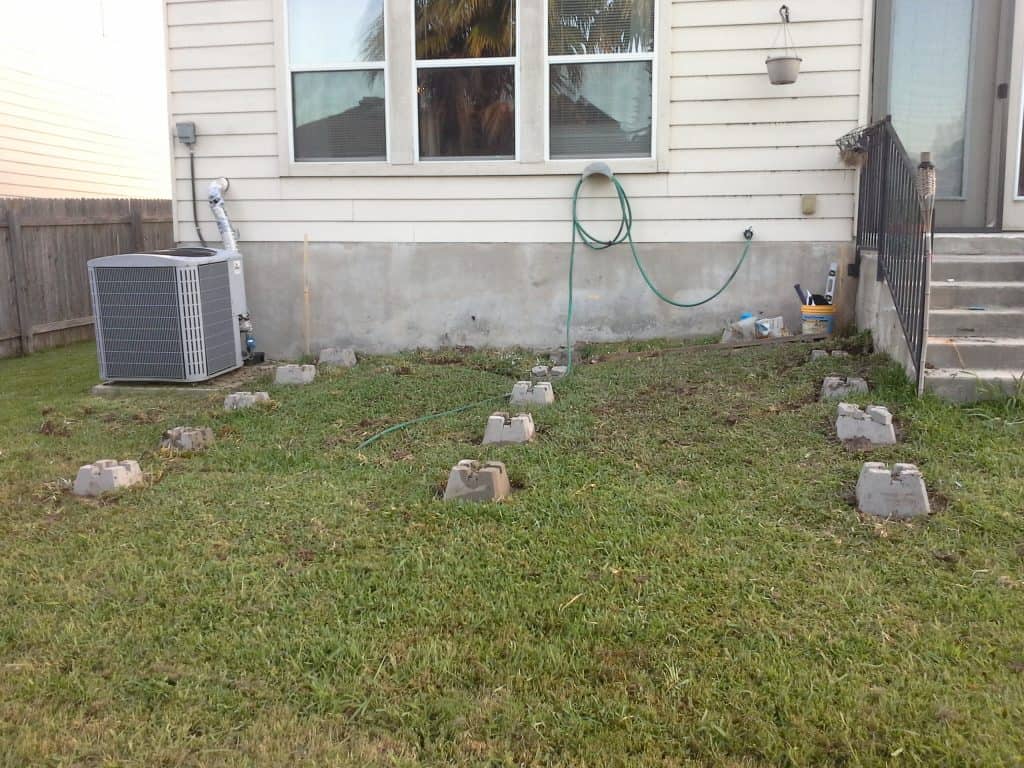
Next, we began to level those blocks as I mentioned. You can see one near the stairs where we had to use the concrete adhesive to fix a corner.
We simply dug a small amount of dirt away, placed the block down, used a level to check it and were done. Do note these things are a little heavy, so be prepared to carry one at a time and if you have a wheelbarrow handy (which we did not), that would help!
STEP 2 – Place the support posts in the blocks
The next step was to cut some 4×4 posts to stand in the center of each block and then run some 2″x6″ support boards from left to right. The length of these boards totally depends on how big your deck is.
We used a lot of 16′ ones which we cut a little short, but if you aren’t having to work around an AC unit and some concrete stairs as we did, I wouldn’t cut them at all and would just center the deck to your space.
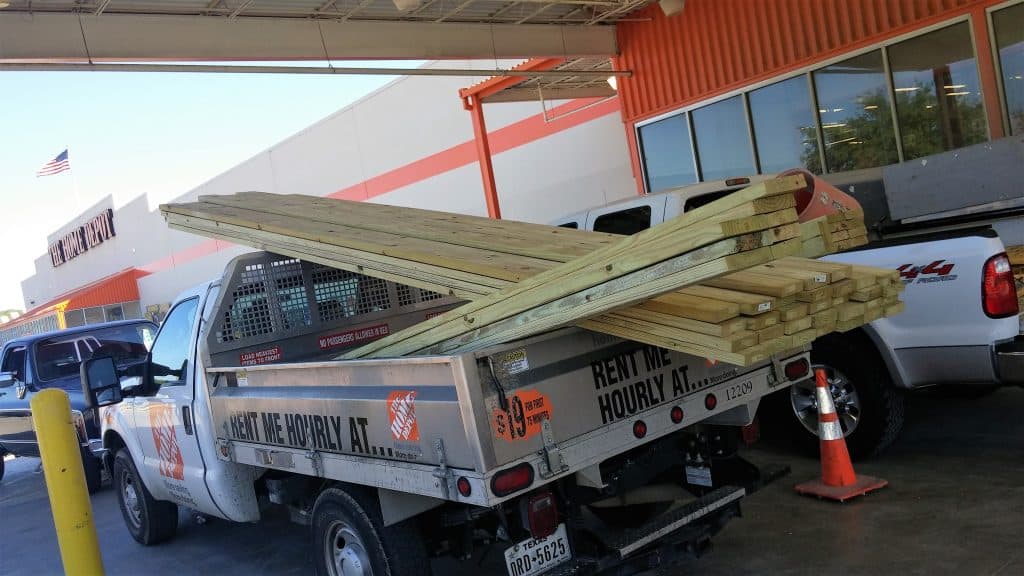
Don’t have a monster truck to haul 16-foot boards for your how to build a deck step by step project?
Do what I did and rent a flatbed truck from Home Depot for $19 bucks!
Here is why it doesn’t matter if the blocks are at the same height; you simply cut the 4×4 posts to the height you want.
You can get all fancy with laser levels if you want. Or use that string that leaves a chalk mark.
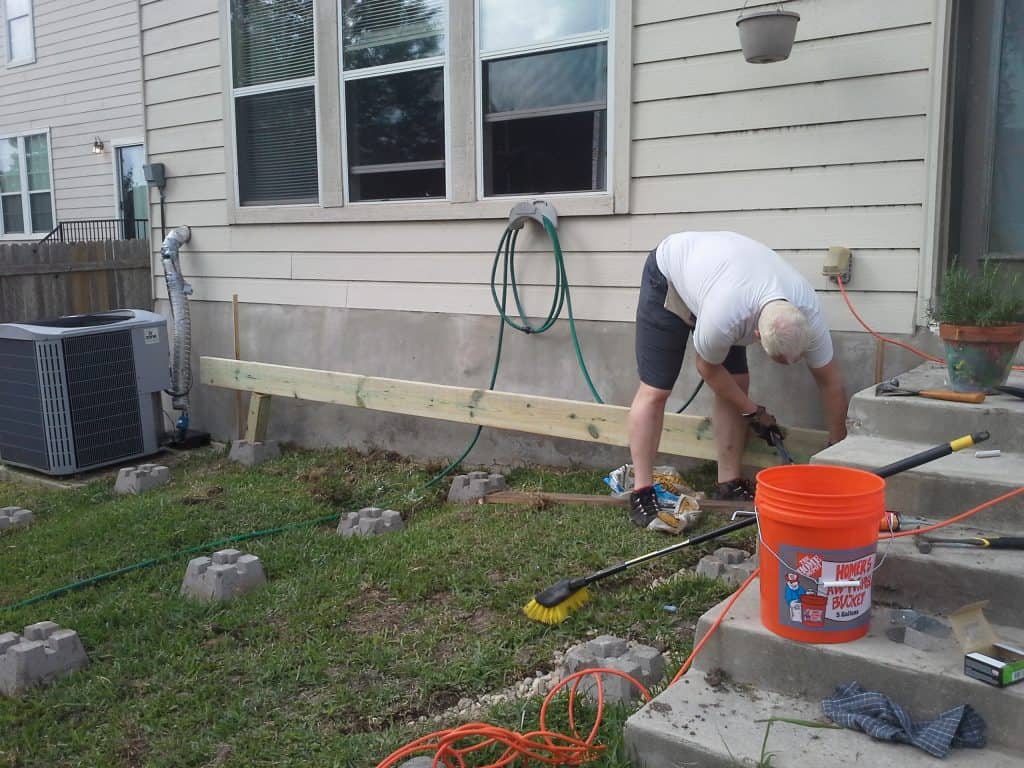
However, all we did was stand the 4×4 posts up gently (since there is nothing keeping them in place yet). Then we stood one of our 2″x8″ support boards (joists) on the top of the end one while one of us held the other end.
Place your level on top of the support board and when it’s level, just use a pencil to mark where the top of the support board is on the other 4×4 posts.
Once your first support board is level then level across for your next support board, leveling across and deep.
Once you get the 4×4 posts set on each end of the support board, go back and put in the ones in between.
What size joists to use for decking?
Joists are the long support boards that run across your deck. The deck boards get attached to these.
Thus these are your primary means of support. In modern construction, these would typically be 16″ apart from one another (from the center of one to the next). In terms of how much weight they can support, you would typically multiply the height of the board (in inches) by 1.5 to determine how many feet it should run in length.
For example, if your joist is a 2″x8″ (as ours were) you would multiply the 8 by 1.5 to determine you should not have it run longer than 12 feet (8 x 1.5 equaling 12).
So before you buy your lumber make sure you know exactly how wide you plan to make your deck and buy the appropriate joists.
Of course, local codes may require something different in your area, so always check with your local code or planning office first.
If you have an HOA they may also require the approval of your plans first as well (which was the case for me).
STEP 3 – ATTACH THE SUPPORT BOARDS
We used these 2″x4″ brackets to attach the support boards to the 4×4 posts. Just use a few nails to hold them in place to the post and attach to the support boards.
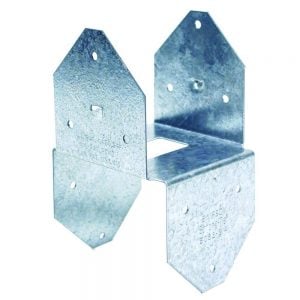
While we used hammers if you want to build a deck even quicker, consider buying a nail gun from Amazon Prime!
This nail gun also called a brad nailer, doesn’t require a compressor. It features 4.5 stars on Amazon Prime with almost 300 reviews, so you know this is a great tool!
The PORTER-CABLE Cordless Brad Nailer Kit comes with the battery and charger and will make a great addition to your tool kit!
Ready to build your deck? Jump right to my recommended tools and supplies page! I only recommend the very top-rated tools and items, taking the worry and hassle out of figuring out what to buy.
You can get everything you need quickly and easily by ordering on Amazon or pre-ordering with Lowes or Home Depot and having it ready for pickup.
If you don’t need your deck much off the ground, skip the 4×4 posts and just place the support boards right into the slots on the blocks; even easier!
No need to attach anything the blocks; once you nail the wood together it will be plenty stable and secure!
Talk about how to build a deck step by step with pictures! It doesn’t get much easier than that.
If you go the route of not using the posts, however, you will want to make sure the blocks are level with each other.
Simply rest a support board between 2 or more of the blocks and set your level on top. You’ll see which side needs to go lower and then just dig a little until you are right on the money.
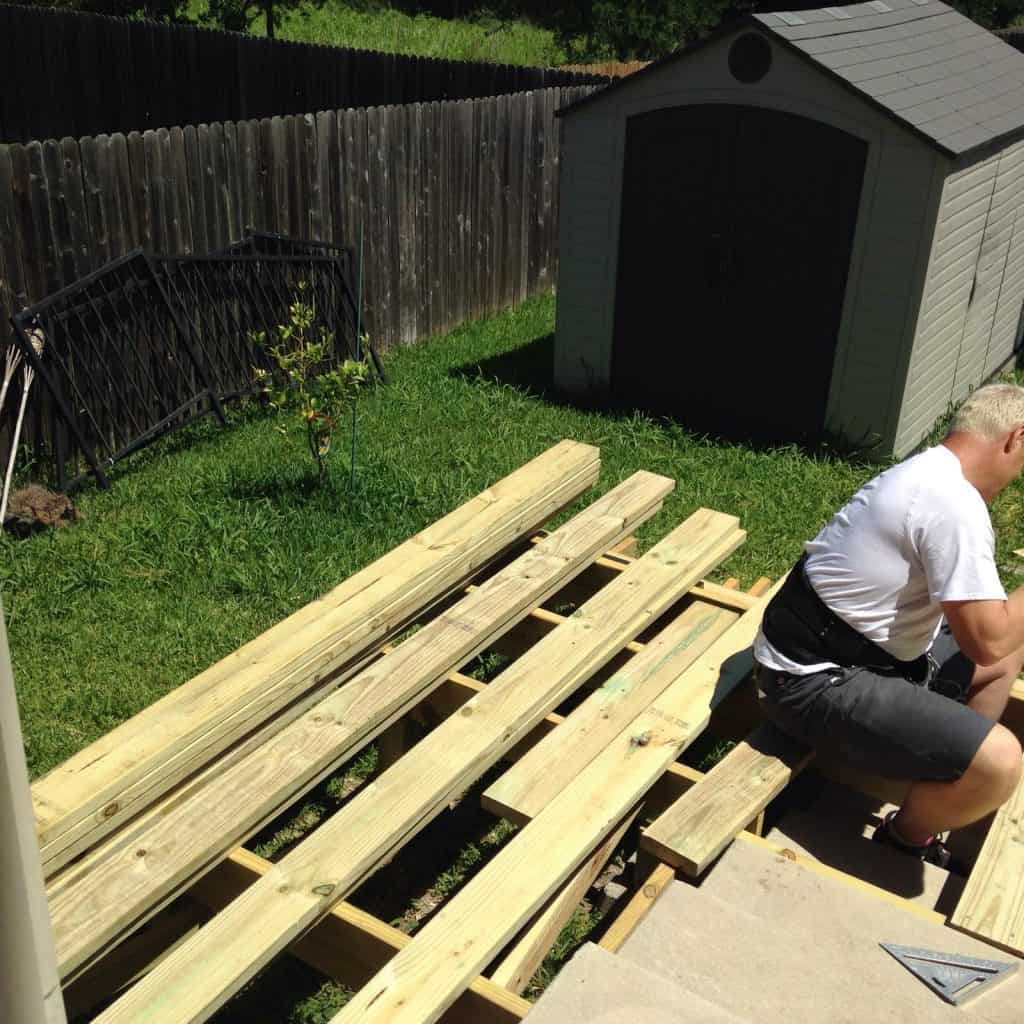
Speaking of money, here’s a money shot of Dave working with the support boards on top of the posts.
Once you have the 4×4 posts attached to the support boards, your foundation is done.
Now you’re more than halfway done in your how to build a deck step by step with pictures project!
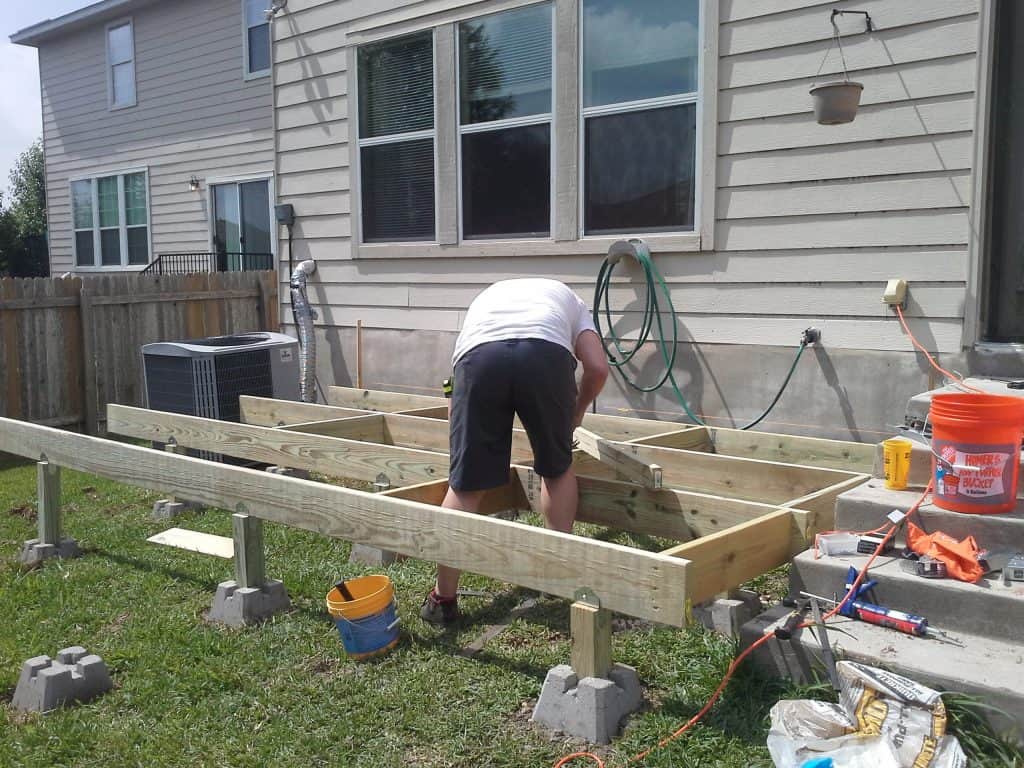
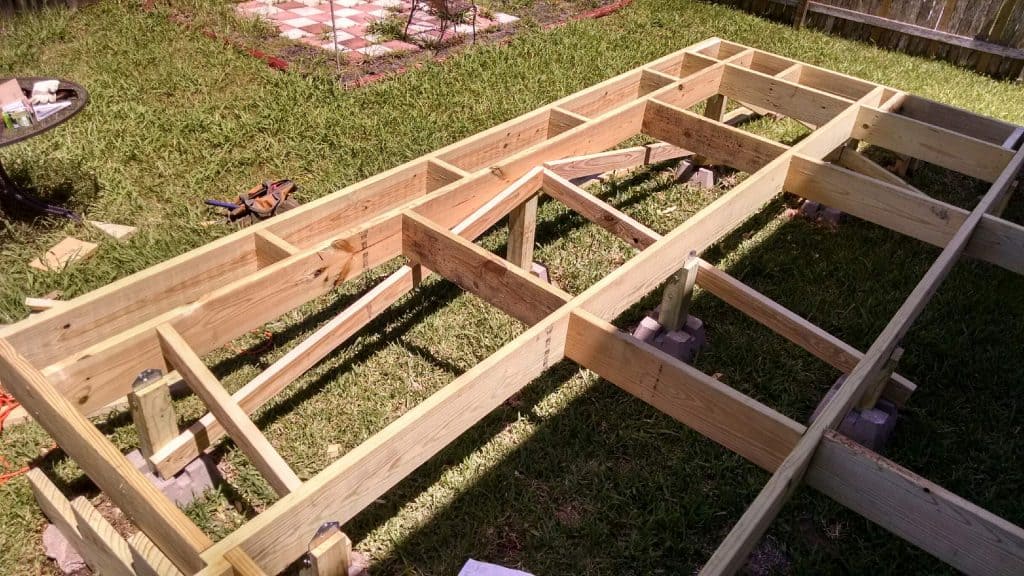
STEP 4 – BRACE YOUR SUPPORT BOARDS
With the support boards attached to the posts, they still aren’t that stable.
They are connected to each other, but not across. Now you simply need to cut some more support boards to run in between the long runs.
Simply measure the distance in between the long support boards, and cut additional support boards to that size and nail in place.
Now your deck should start to get pretty stable when you’re done. About every 4 feet should work just fine.
Dave also ran some 2×4‘s from the front center down; that’s what those angled boards are. That just added some extra stability.
Bear in mind most of this appears hidden once your deck boards go on, so it doesn’t have to be pretty!
You’ll notice that Dave added a short section to the front of the deck.
This is basically to have the deck extend a little beyond the first set of posts and blocks; basically to make it look nicer.
We just nailed those small cut boards to the last joist attached to the posts and blocks and then added one more joist on the outside.
But let’s get back to how to build a deck step by step with pictures.
STEP 5 – Attach the decking floorboards
Now all that remains is to put down the deck boards.
You can add stairs depending on the height off the ground and a railing too if needed. But the deck boards will complete the basic deck.
You could stagger the deck boards as you would on a wood floor in your house. I’ve also seen fancy decks where the deck boards were at a 45° angle.
But we simply laid them out even, starting where the deck comes close to the back wall of the house.
Note: we did not put the deck boards touching the house. That allows for rain to flow off the inside edge of the deck. It also allows for natural movement of the land and house.
Simply lay the deck boards out, side by side and nail them down.
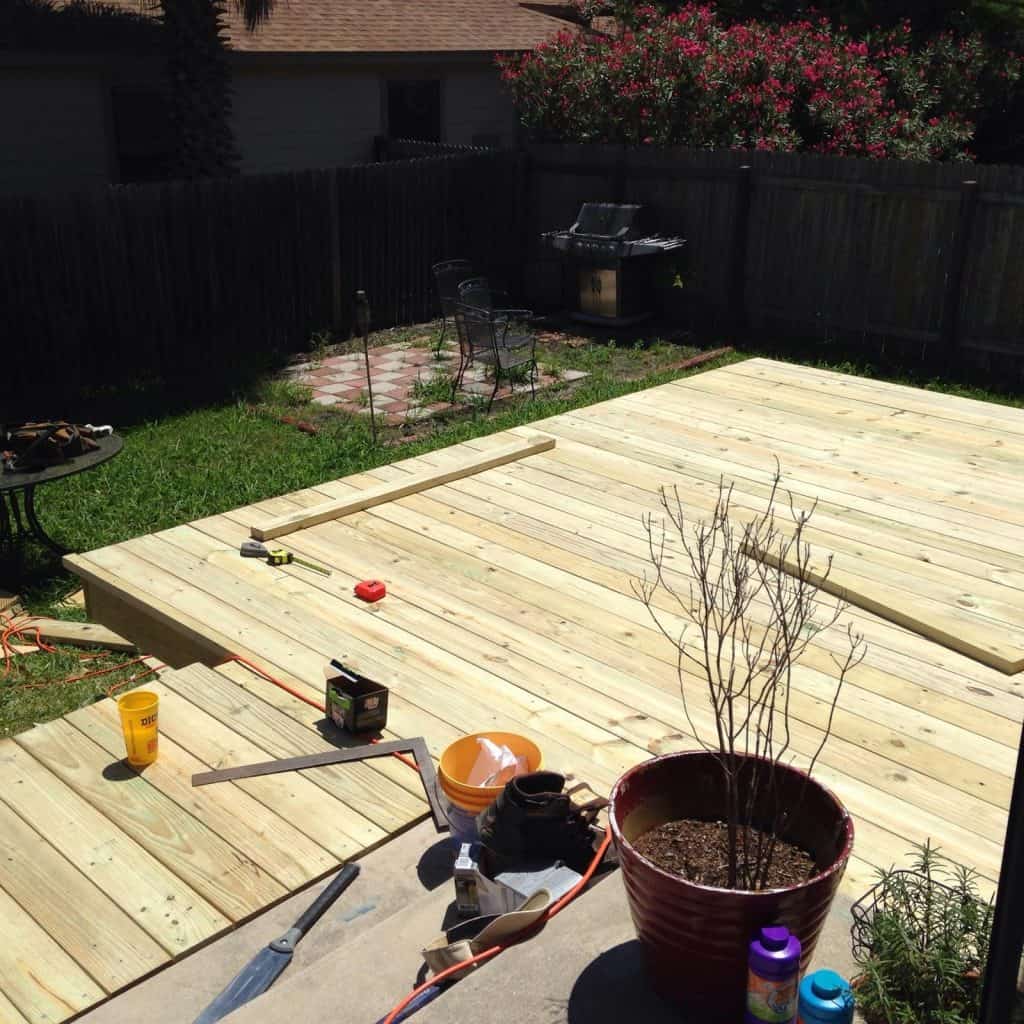
Ideally get boards that are the right length for your deck. However, if they are a tad long, once they are all nailed in place, mark how much you need to cut with a pencil. Then just come along with a circular saw and cut the ends off.
For a “prettier” look you could also take the time to measure and cut and put the cut side towards the back wall of the house.
WORKING AROUND CONCRETE STAIRS
In the case of our deck, we had some old concrete steps. They came off the back door of the house down to the ground.
We built the deck around them as removing it seemed like a pain. Hopefully, you won’t have to mess with that. But I actually think the end result looks great.
If you do have stairs with a railing, as we did, simply take a grinder and cut the bolts holding the metal railings to the concrete.
Then we built the frame around the steps, which hid the lower steps but utilized the upper ones.
This shot shows you how we worked around the steps. It also shows the frame for the wooden steps we added. The closer to the ground you build a deck, the less of a need you have for steps.

Don’t feel like you have the skill to cut the notched boards for the steps (what they call stringers)? You can buy those pre-cut an Amazon too. Select 3 steps or 4 and it’s done!
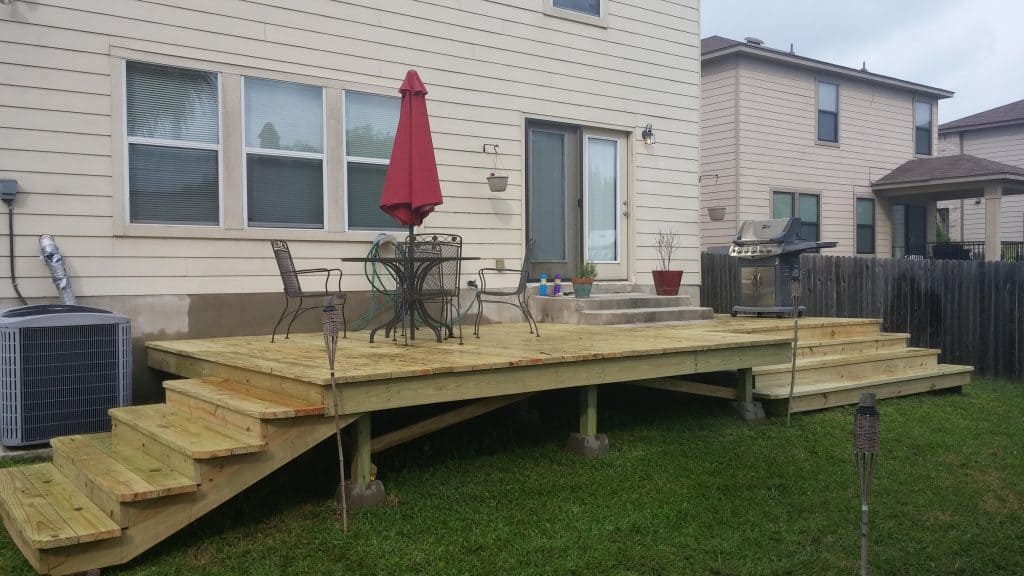
Here is what the finished deck looks like!
And with some deck stain added!
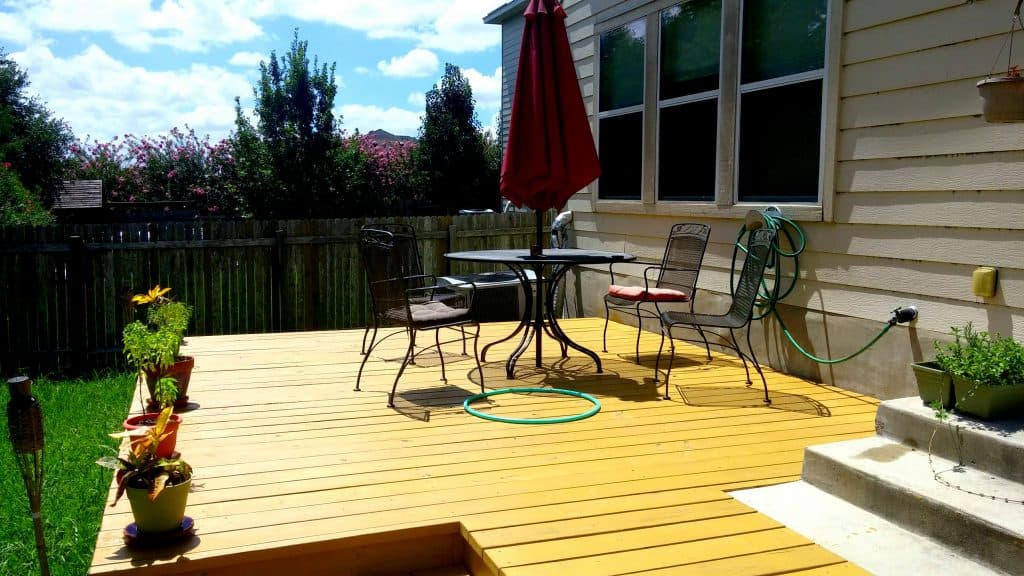
For stain, we really wanted the natural wood to come through so we went with a semi-transparent stain. The color was called Harvest Gold from Thompson’s Signature Series.
And that completes our how to build a deck step by step with pictures project!!
Sometime in the next 12 months, I hope to put some type of roof or covering over the deck. That way we can use it in the rain and in scorching heat. I’ll do a new post when that happens!
Ready to build your deck? Grab a copy of the plans my friend Dave drew up for my deck!
Did I cover all you wanted to know about how to build a deck step by step with pictures?
In this post, I walked you through the exact steps I took with my friend Dave on building my deck.
We had a great time and the deck went up quickly and easily. If you’re looking to learn how to build a deck step by step with pictures, this post should have given you everything you needed.
Have you built one and have tips to share or links to picture?
Ready to build your deck? Jump right to my recommended tools and supplies page! I only recommend the very top-rated tools and items, taking the worry and hassle out of figuring out what to buy.
You can get everything you need quickly and easily by ordering on Amazon or pre-ordering with Lowes or Home Depot and having it ready for pickup.
Not ready to build your deck yet? Why not save this pin to your favorite Pinterest boards so it will be there when you need it? I update it frequently too!


Photo credits (that aren’t mine):
Original article and pictures take https://newmiddleclassdad.com/how-to-build-a-deck-step-by-step-with-pictures/ site
Комментариев нет:
Отправить комментарий