Projects using this Product

Also from DBJ - The Craft of Custom Cabinetry
No comments yet! Add a comment below:
Original article and pictures take https://archipro.co.nz/products/wine-cellars-dbj-the-craft-of-custom-cabinetry site
No comments yet! Add a comment below:
Original article and pictures take https://archipro.co.nz/products/wine-cellars-dbj-the-craft-of-custom-cabinetry site

Children's room for a boy: Children's Art Nouveau from Sweet Home Design
Original article and pictures take https://decorhouse.space/childrens-room-for-a-boy-childrens-rooms-in-by-sweet-home-design/ site
Back in August when I published the tutorial for building an X-leg bench I feel like I sort of breezed over the upholstery of the top. I wasn’t thrilled with how the original one I made came out for a couple of reasons. I wished I had done folded corners instead of the cover I sewed, but my biggest mistake, and regret, was trying to be thrifty and reusing some old foam I had from an old, old furniture set. The foam was so soft that when you were sitting on the bench you pretty noticeably felt the plywood underneath. Not good.
Lesson learned here: use high-density foam when making furniture. It’s expensive, with 4″ foam usually running $69.99 a yard, but JoAnn Fabrics is pretty much always offering a 50% off coupon and I’ve made a point to never buy foam without one!
So, as much as I was groaning inwardly at the thought of redoing the top, I wanted it to be done “right.” My point in making these wasn’t to just have any old x-bench in my living room. I wanted the benches to look professionally done and the way they looked and felt kept nagging at me.
So I removed the tops from the x-leg base, pulled out all the nailheads, removed the fabric, batting, and foam, and found myself back at a bare square of plywood. The bonus for you is that I’m now able to offer you a much more detailed tutorial on how to upholster the bench tops than what I originally provided.
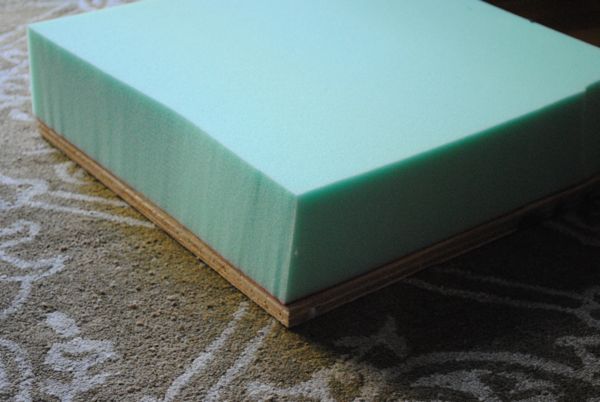
Use an electric knife to cut high density foam exactly the same size as your plywood top.
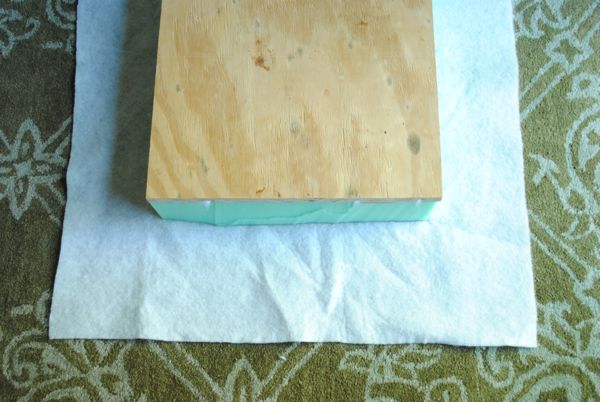
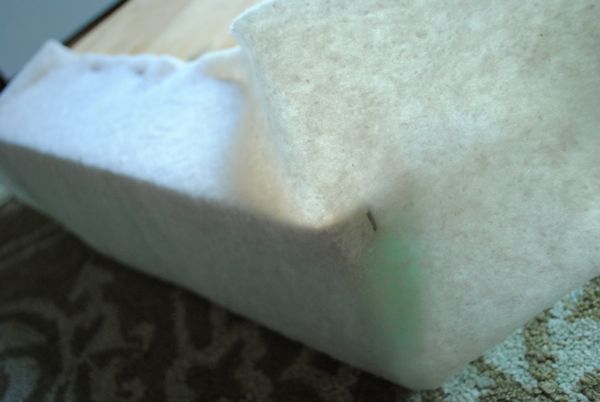
Lay a square of batting on the floor cut it about 6″ wider than the plywood on all sides. You can eyeball the measurement by laying the foam on top and cutting. It just needs to be big enough to wrap around the foam and plywood and staple to the underside of the plywood. Lay your foam on top of the batting, centered in the middle, then place the plywood on top of the foam so they line up exactly.
Pull the batting in the center of one of the sides snugly up and over the foam and plywood and use a staple gun to staple it to the plywood. Pull the batting snugly and staple on either side of the center staple, a few inches apart. Repeat for an adjacent side.
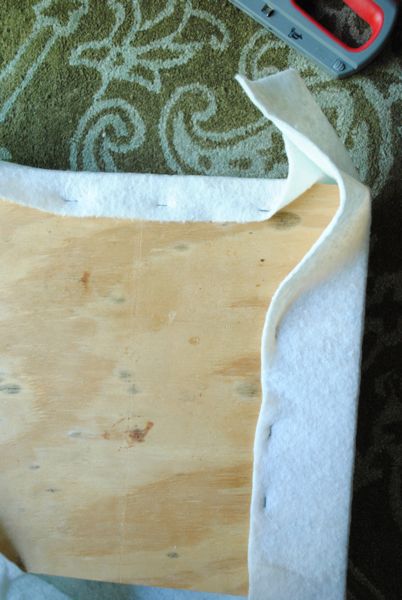
For the corner, fold one side of the batting across the plywood corner and staple.
Cut excess batting away to reduce bulk and wrap corners like a present so the batting lies relatively flat. Staple in place.
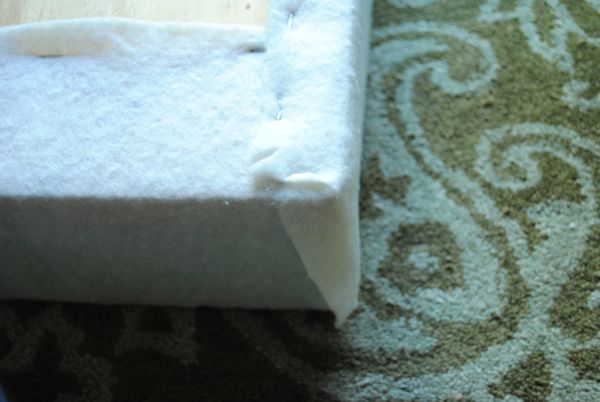
Repeat with the other sides of the batting until the whole top is neatly and snugly wrapped in the batting.
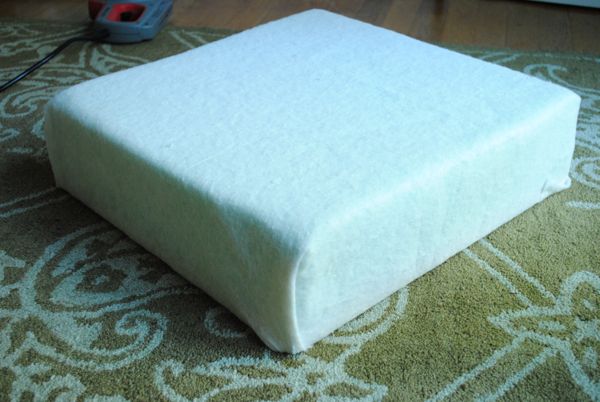
Next lay your fabric on the floor upside down and place the batting-wrapped top in the middle of the fabric, foam-side down. The fabric should be cut 6″-7″ wider than the top on all sides If you’re using a patterned fabric you’ll want to pay special attention to keeping the pattern straight and centered. As with the batting, pull the middle of one side of fabric up and over the top and staple it to the underside of the plywood. Repeat with staples on either side of the center staple and again on an adjacent side.
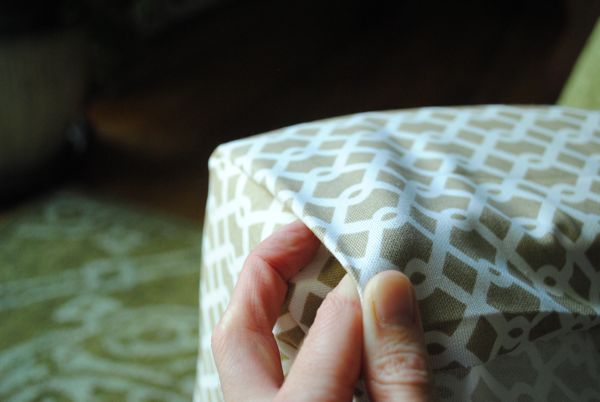
For the corners, wrap one side across the corner like you did with batting and staple in place.
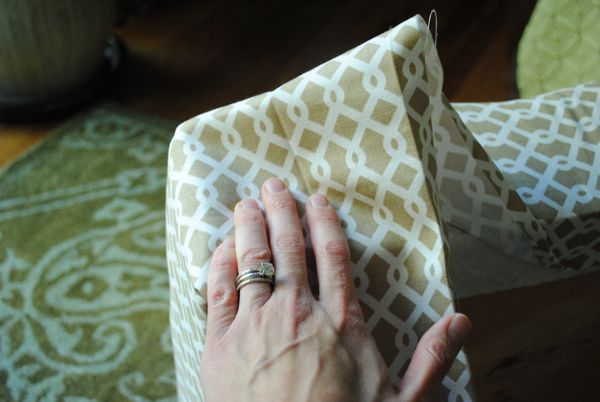
Play with folding the fabric until you get a straight smooth edge. Note where the edges will be and trim excess fabric. Be sure not to cut so much that you expose a raw edge, but take away a good bit of the extra so you aren’t left with lumpy corners.
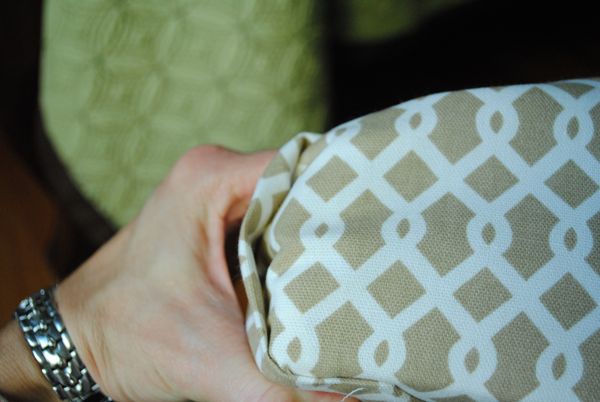
With excess fabric cut away, tuck the edge with the staple under and tuck and fold the other edge over top and pull tightly to the underside of the plywood and staple. Staple any loose fabric flat on the bottom.
Repeat with the remaining corners and end by stapling any fabric left still loose to the underside of the plywood.
*Remember to be watching your pattern as you’re stapling to keep it as straight and even as possible!
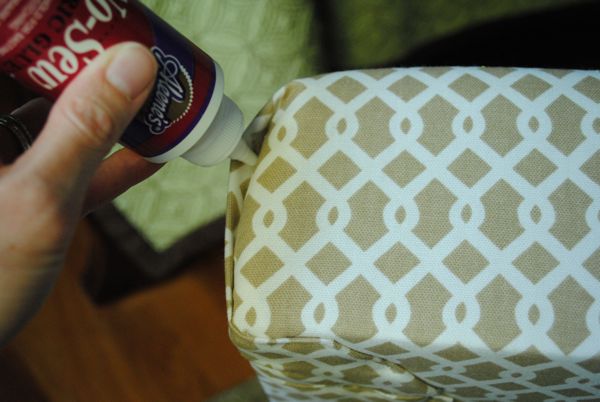
Run a hot iron over the folded edges to make sure they are as flat as can be. You can leave them as is from here, however, when someone sits on the bench the edge will bunch.
To solve this issue, I ran a line of fabric glue inside the fold and held it in place for a minute to set, then let fully dry.
I reattached my upholstered seat to the X-leg base using wood screws.
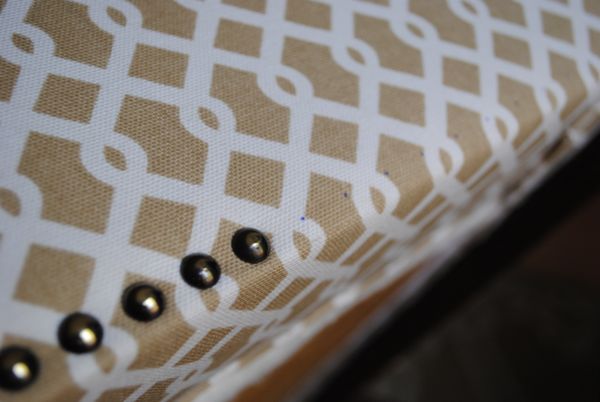
For the nailheads, I used a ruler to mark dots in a straight line every 1/2″ and then hammered them in one at a time. High quality nailheads are important because they’re less likely to warp and go crooked. I’ve had good luck with ones from Lowes and DIY Upholstery Supply.
And now, truly, I love my x-leg benches. Sometimes it’s best to cut your losses and start over to get what you really want.

The two benches wound up being photographed for Better Homes and Gardens magazine with my sofa that I reupholstered – you can see the photo that was in the magazine HERE.
And here are a couple easy-to-pin graphics if you want to earmark the tutorials for making this x-bench for later!

Original article and pictures take http://www.thechroniclesofhome.com/2012/10/tutorial-how-to-upholster-bench.html site

The Salisbury Rabbit House is a beautifully shaped, arching, Rabbit Haven with a run integrated into its design. Perfect to keep your rabbits safe and sound, as well as adding a lovely piece of architecture to your garden.
This spacious rabbit or guinea pig house, with its arched timber design is made here in Dorset from curved joinery-quality Swedish redwood timber. The timber is pressure treated to ensure long life outdoors and the strong weldmesh is galvanised then green plastic coated for longevity. This all-in-one house and run combination creates a really efficient use of space whilst looking absolutely stunning.
This Salisbury Rabbit House measures approx 9ft 6in long x 4ft wide x 4ft 6in high externally (exact dimensions: External Width: 1350mm; External Height: 1400m; External Length: 2880mm). 3ft and 6ft Extension Runs also available.
The Salisbury Rabbit House comes with a vertical sliding rabbit door, operated on a drawstring, on to a little outside 'Sun Deck'. We have added a raised edge, a bunny barrier, to the sun deck to prevent those 'wish I'd brought a parachute' moments. The Sun Deck is 29cm wide, for those lazy hazy days of summer. From the Sun Deck, a long offset ramp (16cm wide), with bunny barriers, gives them access to the green green grass and hence to lots of exercise.
Inside the Rabbit House the floor is made of hard-wearing, phenolic-coated, brown resin board making it washable and 'super-easy' to keep clean. The floor area measures 118cm wide x 78cm front to back with a max. height inside of 71cm. The sleeping quarters inside are a cosy, removable, high-sided tray (57cm x 35cm x 13cm H) with a tall plywood wall to prevent draughts. Also included is a wooden meshed frame to hang the water bottle, hayrack and feed pot on for overnight refreshments.
Outside, the run area is a total of 38 sq ft including the sheltered area underneath the house. With an internal height of approx. 4ft it is also perfect for little ones to sit inside and play with their beloved pets, as well as providing lots of lovely height for bunnies who like to stand on hindquarters at times.
The green mesh is half inch by one inch tough galvanised weldmesh, robust enough to deter the most determined predators. We also offer a No-Dig Skirt option to surround the outside of the run to prevent digging predators. The access door at the front has a bolt which can be padlocked if necessary and a turn button internally to keep the door closed whilst inside.
This Bunny house arrives in sectional panels for easy home assembly. The Run is easy to assemble, all the fixings and instructions are supplied. If you would like a copy of the assembly instructions, to gauge what is needed, before your purchase decision then please just call us on 01300 345229.
DELIVERY:
The house is delivered in sections, on a pallet for easy self assembly. The run and the house panels are screwed together making the whole assembly very easy with an electric screwdriver. We estimate it should take around 40 minutes to assemble. Delivery time is currently 2 - 3 weeks from ordering and we will call to agree a delivery date with you. Delivery is via Palletline delivery company and costs from £49.00 to most mainland England, Wales and Lowland Scotland destinations.
Product Dimensions
Original article and pictures take http://www.framebow.co.uk/shop/Salisbury-Rabbit-House-SAL_RABBIT.html#SID=30 site
Your garden has come in and the bounty of it has been dispersed to family and friends. However, you still have more produce than you can consume. What to do? You can process some of it in a pressure canner or freeze it. Some vegetables, though, and a few fruits do not do well canned or frozen. Perhaps it is time to build an underground root cellar.
Ask a Question
Original article and pictures take https://www.wikihow.com/Build-an-Underground-Root-Cellar site
Do you have to leave your cars sitting out in the elements because you have nowhere else to park them?
If so, then you are going to want to tune into this post. I’ll be sharing some of the internet’s best plans and designs to inspire you or help you to build the carport of your dreams.
Plus, I understand what it is like looking for that perfect carport. We are actually in the process of searching for that ourselves, as our new place doesn’t have an attached garage of any kind.
So we are on the hunt too. This is what I’ve come up with:
Before we dive into all of the internet’s best carport designs and inspirations, let’s discuss why you would choose to go with a carport over a garage?
Or why you would even invest in a carport at all?
A carport obviously would be a much smaller investment than investing in building an attached or detached garage.
So if you are working on a budget, but still need a way to protect your car, then a carport might be the most cost-effective way for you to go.
Why should you invest in anything? Well, because it saves your car. The longer you leave your car sitting out in the elements, the more the paint fades, hail and other natural elements beat down on it, and it is totally unprotected from wind damage or snow and ice.
So if you would like to drive your car for years to come, then you need to take as good care of it as you can. This means that if you have the means to park it where it is covered, then this would be a good thing to do.
Carports are actually a nice addition to your home. They can be built as simple or lavish as you desire. Not to mention, if you build it yourself, it should help your home value go up. We were told in our moving process, that any structure that cannot be removed from the property is counted in the appraisal.
So if you choose to go with a carport that is literally anchored in the ground, then it should count towards your home’s value as well. Be sure to double check with an appraiser to make sure this same rule still applies in your situation.
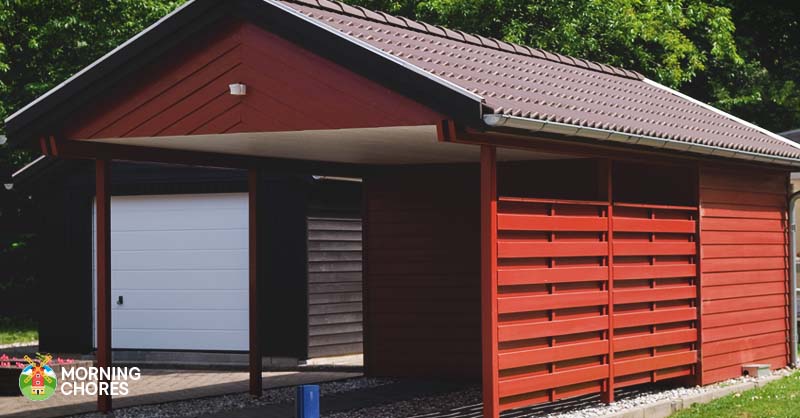
These are very detailed plans to help you build a single carport with a storage section. Not only will this protect your car, but it will also give you an additional place to store anything you might need.
Plus, if you built it close enough to your home, it would almost be like having a small garage. This would definitely be a great convenience to have.
These carport plans look like a nice addition to any home. It has room for 2 vehicles and also has additional storage as well.
So if you need room for both of your vehicles and want to add some storage to the outside of your home too, then you’ll want to check this out.
[The site we sourced the plan from is having some technical difficulties. Hopefully the plan above will give you a good starting point at least.]
This carport definitely has a different feel to it. First, it has the ability to comfortably hold three cars. This is a great feature to have if you have multiple cars, or even if you have a few toys that you’d like to keep covered.
But this carport also has a log cabin feel to it as well. This carport did not come with a tutorial, but hopefully, it will inspire you.
This carport is unique as it has a slanted roof. It is also meant to hold only one car as well, but you could probably figure out how to change that if you desired.
But this carport is so great because it comes with actual plans that also include a materials list and great instructions too.
Do you like to upcycle items into new things that you’ll use? If so, then this carport could be for you. It is an old shipping container.
Then they transformed it into a carport with storage. It would look neat and be functional too.
This carport is very similar to what I would like to build in the near future at my own home. It looks nice and also simple enough to DIY.
Plus, it has room for multiple cars, which makes it a nice addition to most properties. So if you’d like a simple but sharp looking carport, then you should check this one out.
Do you have multiple cars? If so, then you might need a larger than average carport. Look no further than where you are at because we’ve got the plans for you.
So this carport has the space for three vehicles, and it also comes with helpful plans that could assist you with the build.
This carport is meant for inspiration only as it doesn’t come with a tutorial. But if you look close, I think most of us would agree that it is a unique carport.
So this carport can be made as large or small as you like, but the cool thing is it can also help you be self-sufficient as the roof is meant to hold your solar panels.
I love this carport idea because it is one large space. This space could be multi purpose and an asset to most homes.
So when you need to park multiple cars under the carport, it could be there for that. Then when you’d like to host a gathering, it would make a great place to gather or even to have a picnic.
I can only hope that I’ll need one of these one day, but for those of you that are fortunate enough to need one, here it is.
So if you haven’t already guessed, it is an extra tall carport that is meant to hold and protect your RV. It also has additional storage space as well.
This carport has 2 bays which means it will hold multiple vehicles. It also has an extra space for storage which is always a welcomed addition to most homes.
Plus, this design can either be used as inspiration or the plans can actually be purchased, if you feel you may need them. Either way, this carport is a solid and traditional design that would fit in on most properties.
This lean-to carport is meant to be attached to the side of a garage or off of the side of your home. If you would like to have a carport that is attached to your permanent structure, then you’ll be interested in this.
But not only is it a great idea, they offer lots of pictures and the steps to actually help you accomplish this goal.
This carport is another one I really like. I love the finished wood look. I think it allows it to fit into most any home design no matter how rustic your home décor may be, or how modern your home is.
Plus, I love the fact that it can hold two cars since a lot of families have more than one car today. It also has a place for added storage which is always a great addition, in my opinion.
This carport looks rather fancy. It has the nice décor at the top of it, and it also is constructed from wood and brick, which is a nice addition.
So if you’d like a carport that looks a little fancier than most, then you’ll definitely want to check this one out.
This carport is another one that has a nice finished look, but not so fancy that it wouldn’t fit in at most properties.
Plus, it appears to be functional as well since it has room for multiple cars. So if you are looking for a nicer carport, then this could be it.
This carport is basically a pole barn with an additional storage space in the back. This is another example of what I’m looking for on my own property.
But I really like this design because it will fit in around most homesteads or country properties. Plus, it has room for multiple cars and additional storage too.
Most people do build free standing carports so that way you can place them anywhere you like on your property.
So if you need just a basic, wooden, free standing carport, then these plans could be for you. They offer simple instructions to help you along the way.
This is another set of plans to build a lean-to carport. Though the other option gave you real life pictures, this option gives you plans and a materials list.
So maybe with both sets of resources, you’ll have a much easier build and end up with a great looking carport.
I’ve shared another example of an attached carport as well. This one is just a little more detailed so I thought someone with a need for detailed pictures, plans, and materials list might enjoy this version.
So if you are looking to build a carport that is actually attached to your home, then you might want to give these plans a quick glance.
This carport is another one that takes on the shape of a pole barn. You can finish it out any way that you like though.
But if you are in the market for a two car carport that comes with detailed plans and a materials list, then you’ll definitely want to check this one out.
Well, you now have 20 different options to help you build your dream carport on your property and a few solid reminders as to why you might want to make the investment.
We love hearing from you all so please leave us your thoughts in the space provided below.
Original article and pictures take https://morningchores.com/carport-plans/ site